To easily show from obtaining an image to finished for testing and release. Some screenshots are bigger then what you see just click an image to see the full sized screen.
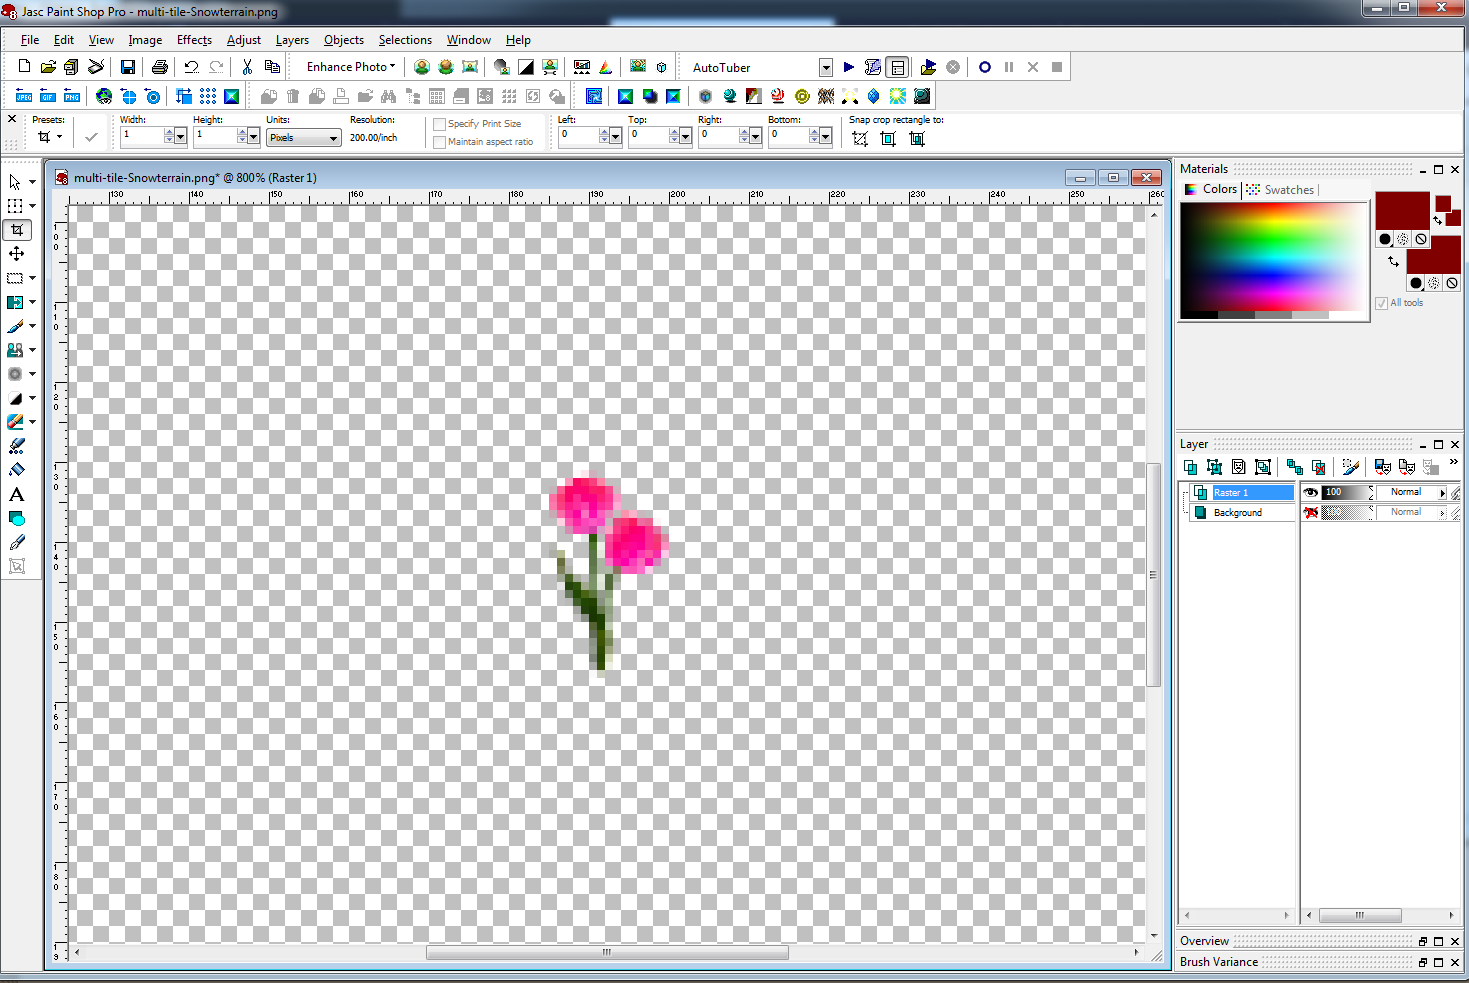
I found an image of a tulip stem with 2 flowers as I already have this image in 8 colors I have no need to recolor it. Remember my graphics program of choice is Paint Shop Pro. This program is reasonably priced compared to others and can do pretty well everything we need it to do. If interested in getting this program you can check out the Corel website for pricing. The best time of year to grab this program is the month of August as then usually lower the price significantly for back to school special sales.
https://www.paintshoppro.com/en/products/paintshop-pro/You don't have to use PSP for your graphics but with these screenshots and explanations of what is being done hopefully you can locate the tools that do the same job in your graphics software of choice.
To see all the tool icons I have across the top of my workspace as well as the pallets I use on the right side of my workspace follow the following 2 screens.
For all the tool Icons
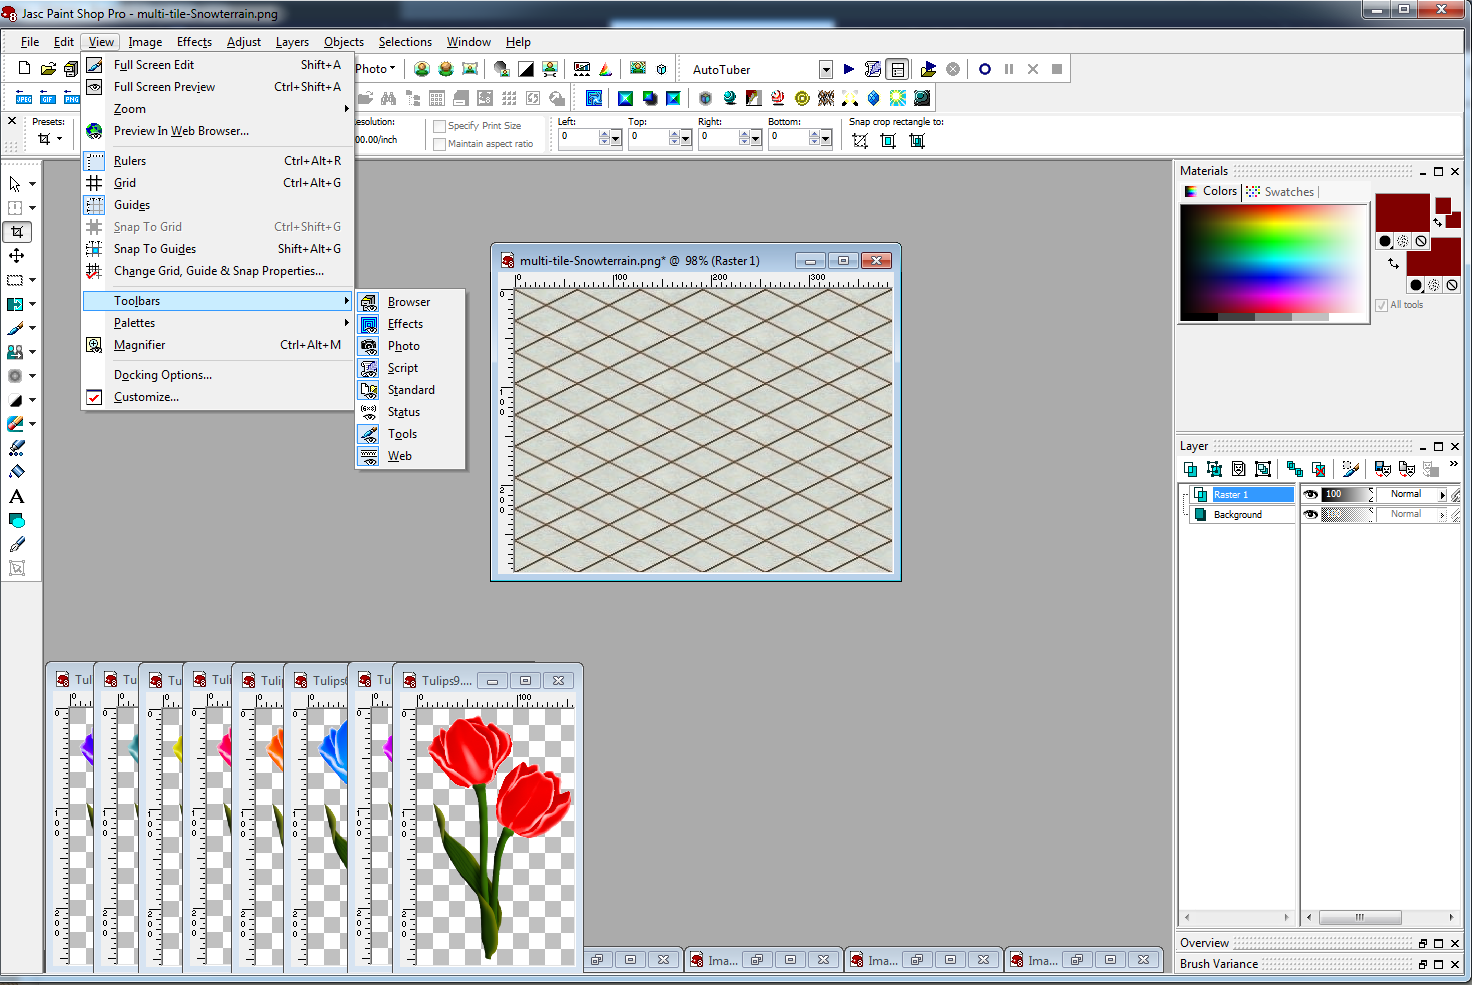
for the right side pallets
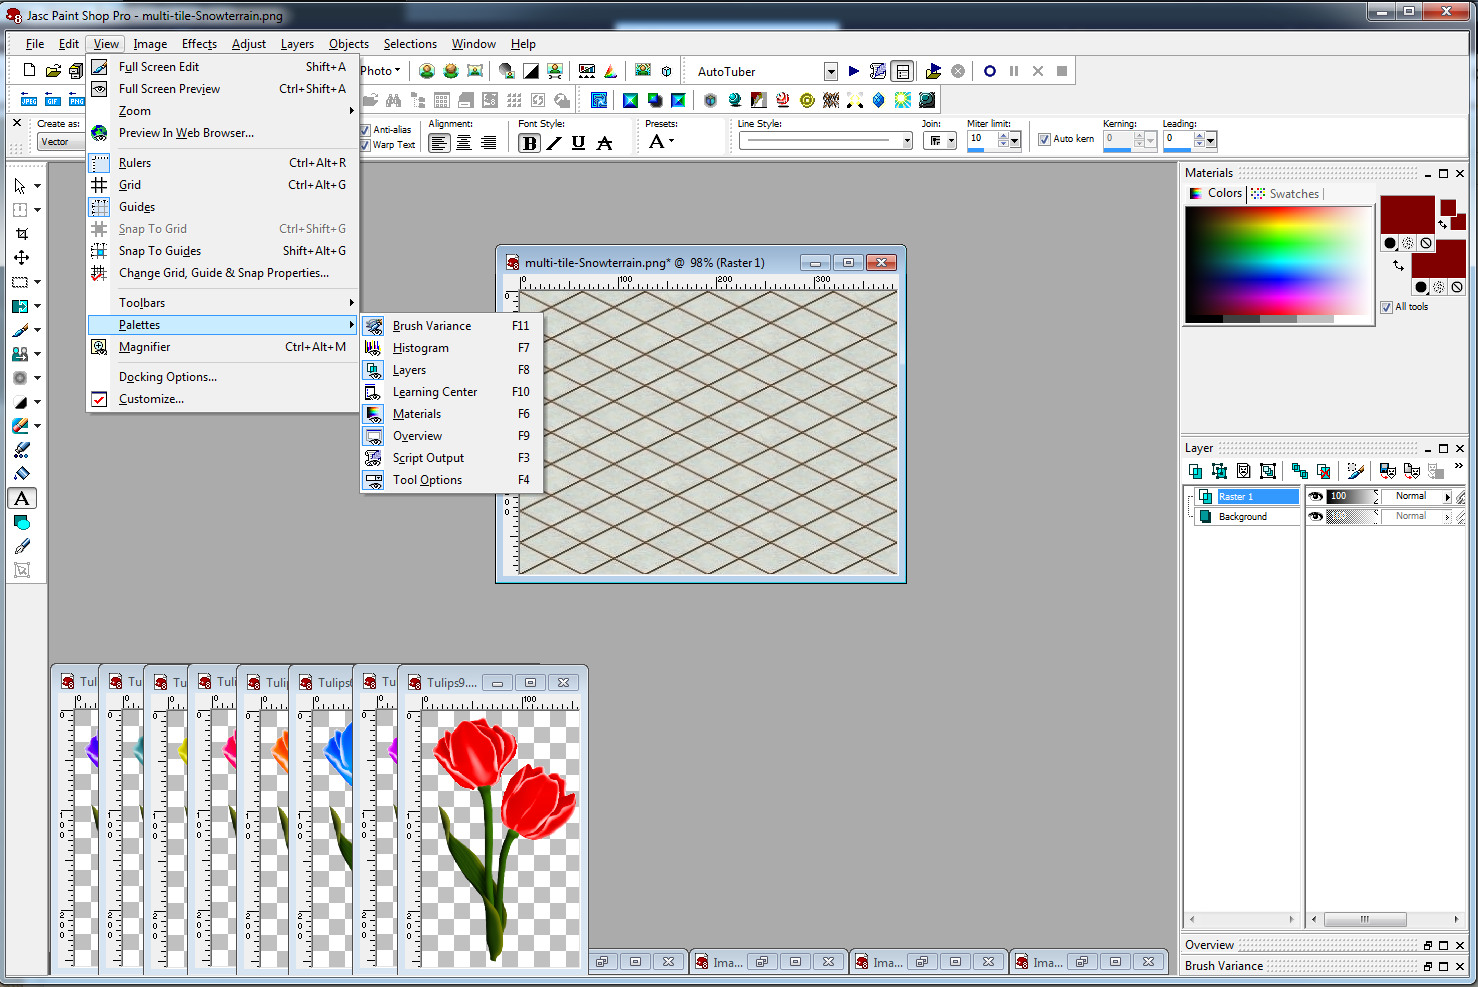
we won't be using all of the pallets we will just be working with the materials pallet and the layers pallet.
My original Image was 302 pixels wide x 494 pixels tall this is obviously way to big to be used in ZT

to obtain the resize window you see to the right of the tulip image in this program you would look in top menu bar for image and click it scroll down to resize and click it and you should get the resize window.
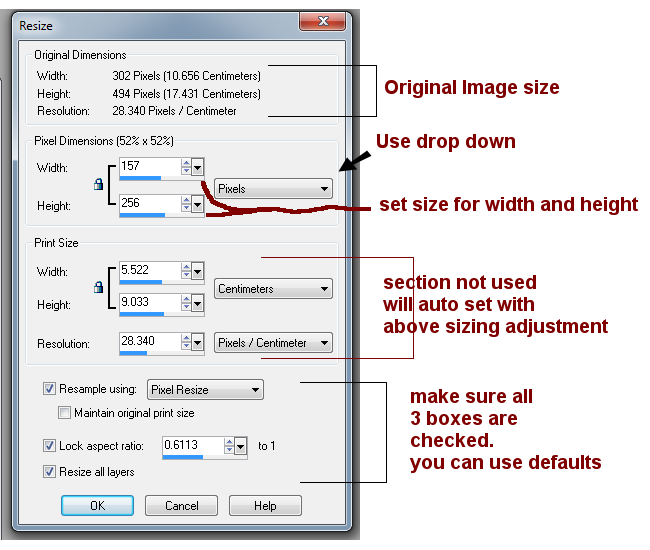
the top section tells you your original image size
next section is where you can change parameters for the size you want. Make sure to use the drop down and select "Pixels"
Next section we don't touch it will auto set using the sizing changes you entered in the section above it.
bottom section sets how your image will be resized. I usually just go with whatever default settings are there but if you want to experiment with the aspect ratio setting remember to make note of the default settings so you can change them back if you don't like the result. The nice thing about PSP is it has an unlimited undo feature so if you don't like the way something turned out for a particular step just click the undo and redo the step using parameters you're happy with.
I was happy with the defaults so just clicked ok and this is my resize result.
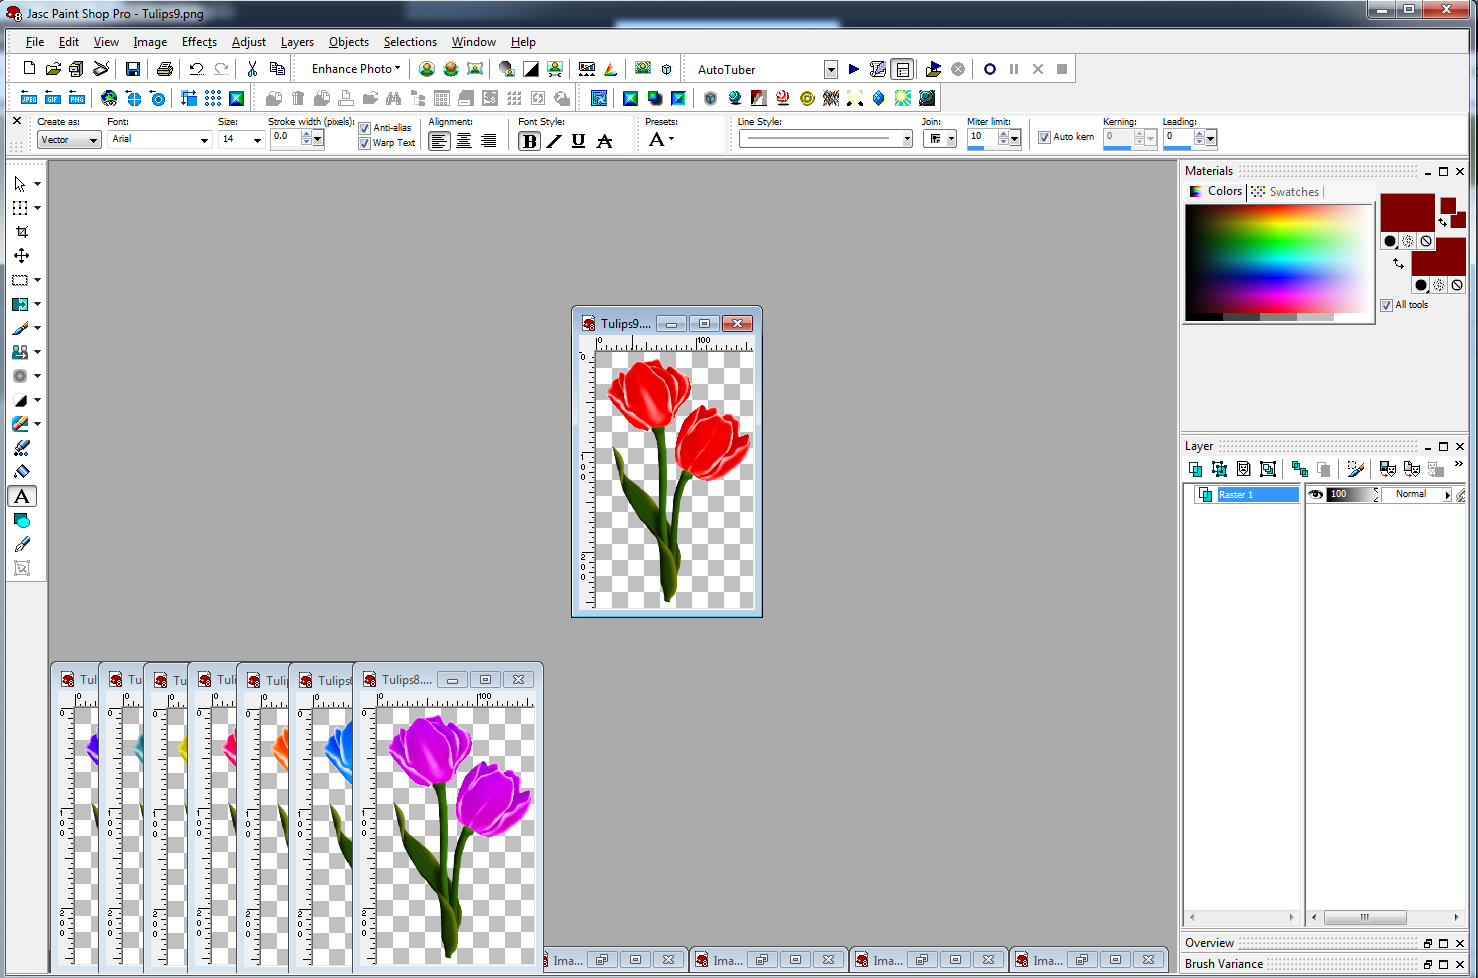
As you can see the image is still way to big to be used in ZT so another feature I love about PSP is the ability to convert your image to what PSP calls a Picture Tube. This is a great feature as it allows you to draw and paint an area with the picture rather then a paint brush of solid color.
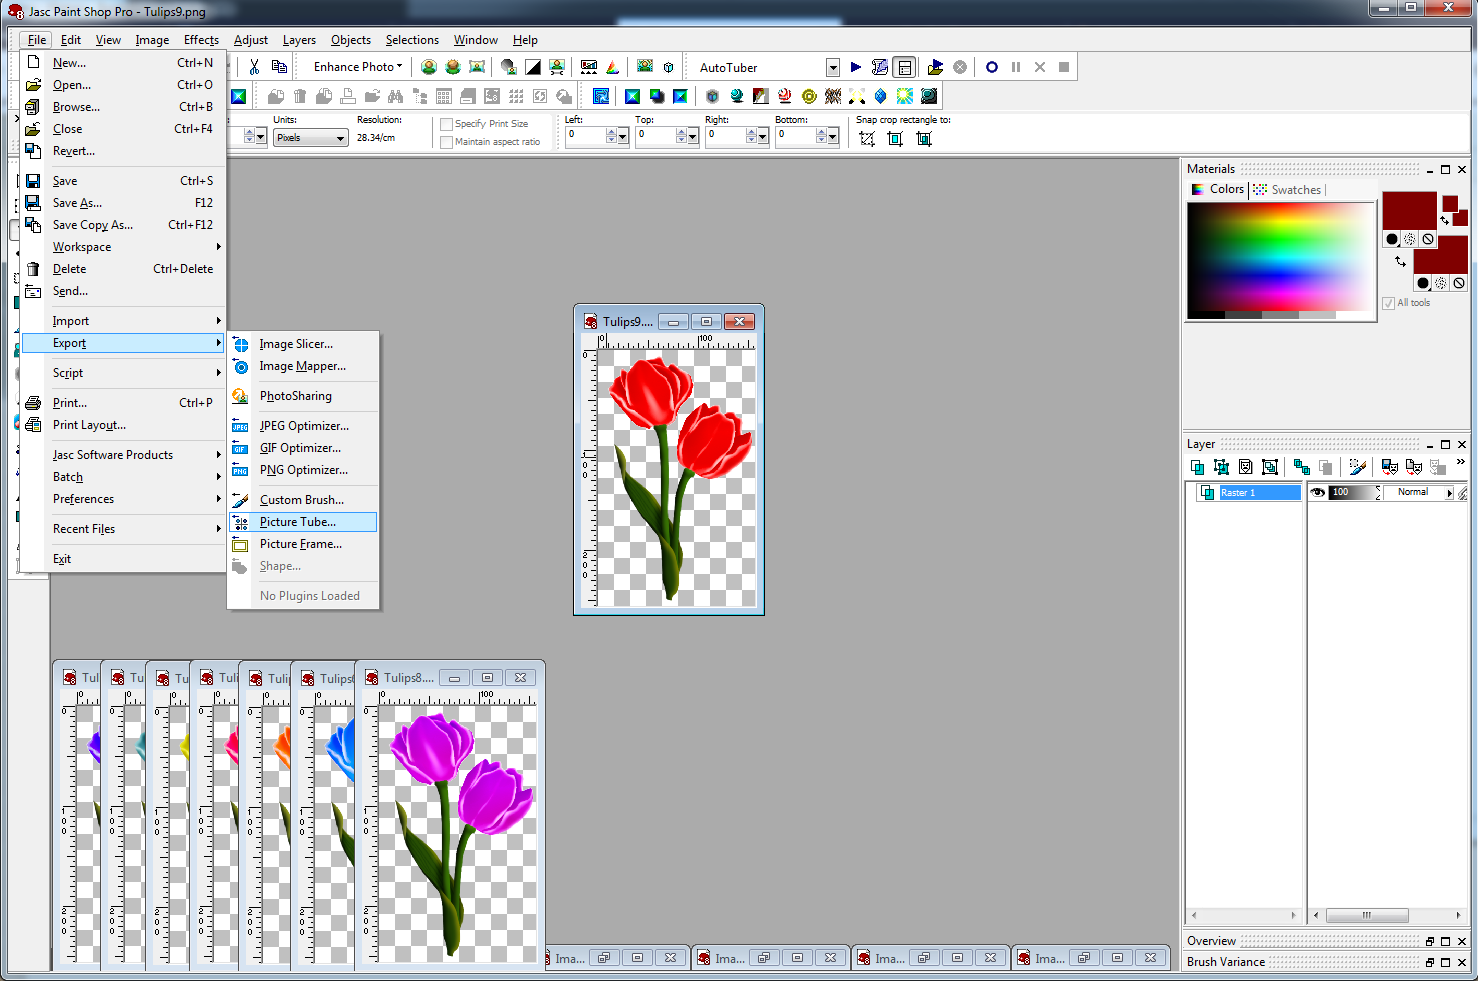
to convert my resized image to a picture tube go to the top menu and select file/Export/Picture Tube
this will open a new window with settings that can be adjusted. Seeing as we are working with an imge with only 1 tulip in it, I just used the default settings you see in the screen.
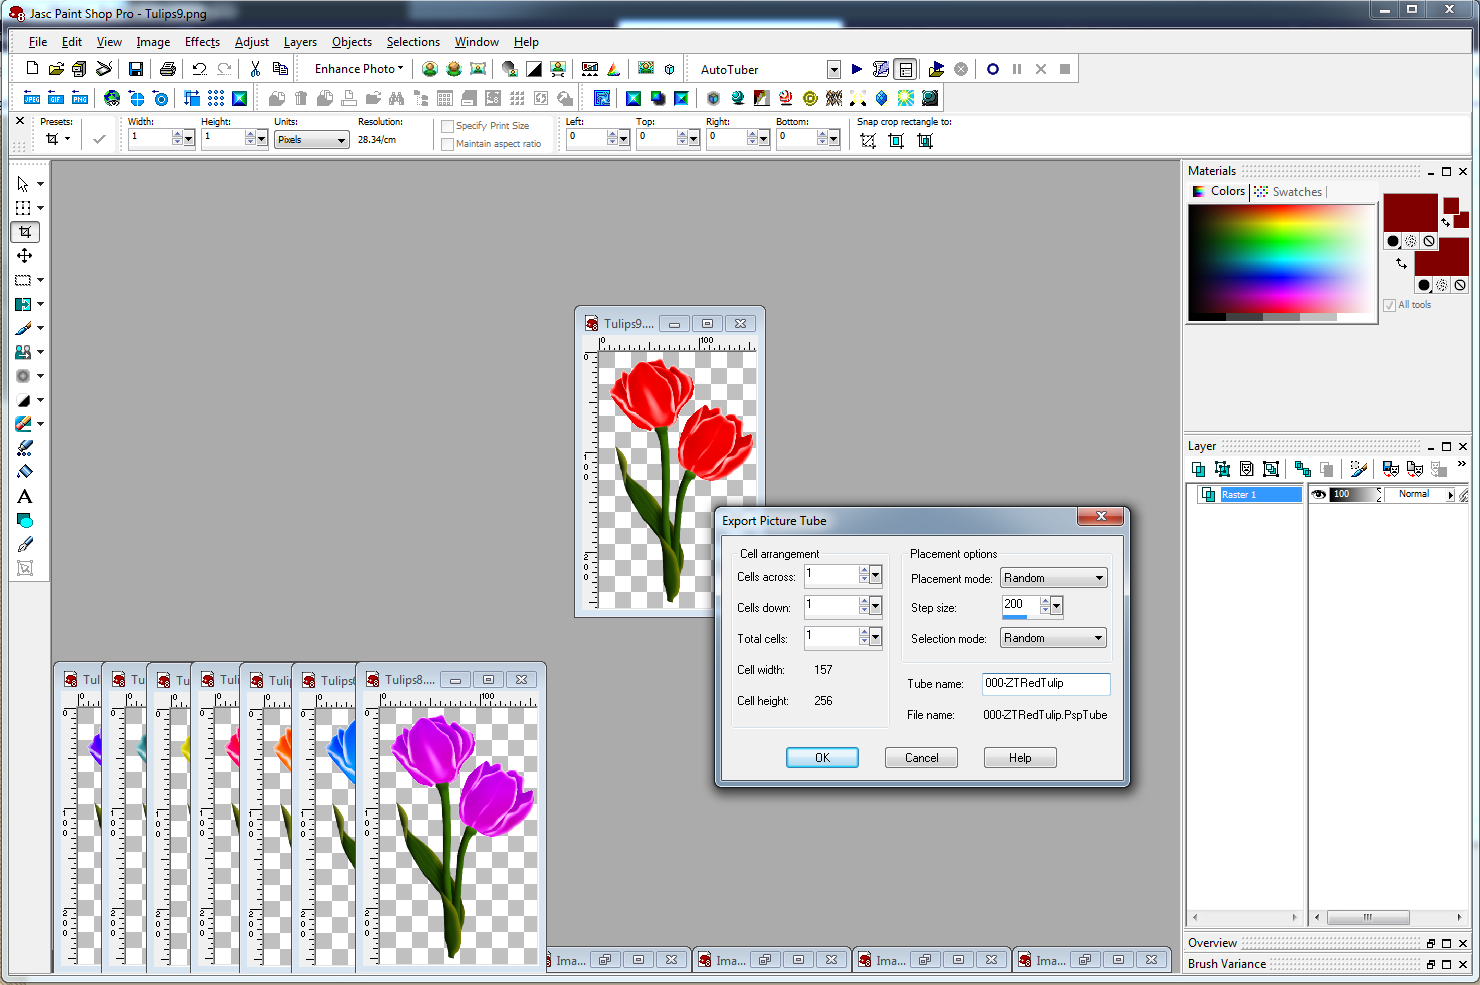
enter a name for your tube and click ok.
Because I have a collection of over 14,000 picture tubes I add the 000 to the beginning of my tube names so it makes the ZT ones easier to find in my tube list as you will see in the next few screens.
Now that you have your image resized and converted to a picture tube it's time to select your picture tube for use to continue your creation.
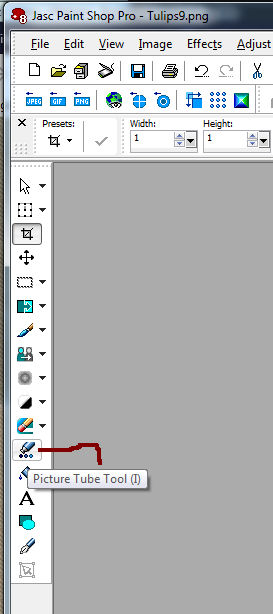
The picture tube tool can be found down the left side of the PSP workspace
when you select the tools from the left side tools selector you'll notice a change in the top of the workspace. You'll notice the tube name in this screen is different then in an earlier screen, that is because I had already converted the 8 colored tulips to tubes before beginning this tutorial.

this is what all those settings do some as you can see have settings you can adjust but for now we are going to leave them at the default other then to change the scale of the tube for use in ZT.
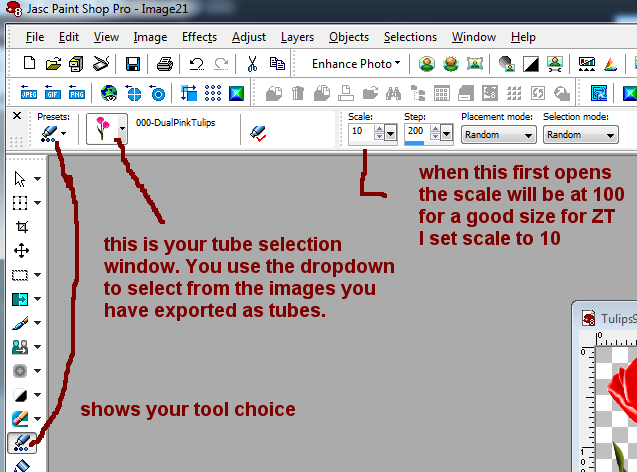
Use the dropdown arrow to the right of the tube selector image to select your tube from all the tube images you may have installed in PSP as I mentioned I have over 14,000 so only a few are shown in the small selection window with the one you select having a blue frame around it to show it is your active selection.
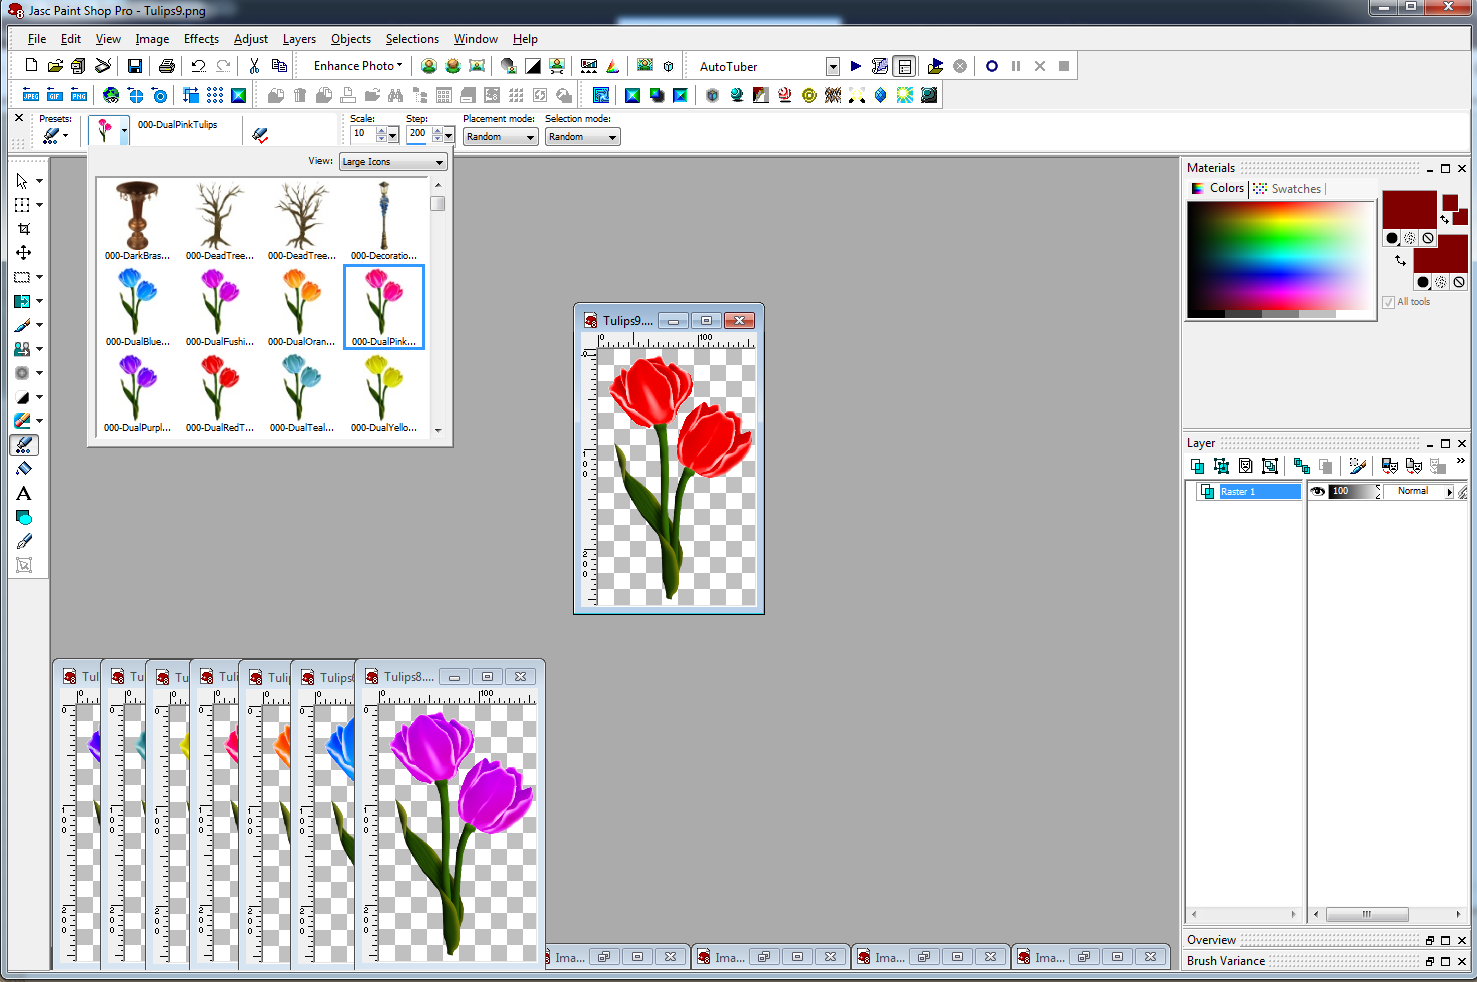
With your tube selected adjust the scale from 100 to 10 so our tube when we use it on a layer as we move on will be an appropriate size for use in ZT.
Now it's time to get down to the process of putting our final image together for ape and using layers to obtain the finished image.
My base layer is always a copy of the zoo tycoon grid. this image is 1024x768 not sure who made it but I will attach a smaller image that can be sued for most small creations.

I have cropped the grid to 384x288 and will attach it to this tutorial so you can use it.
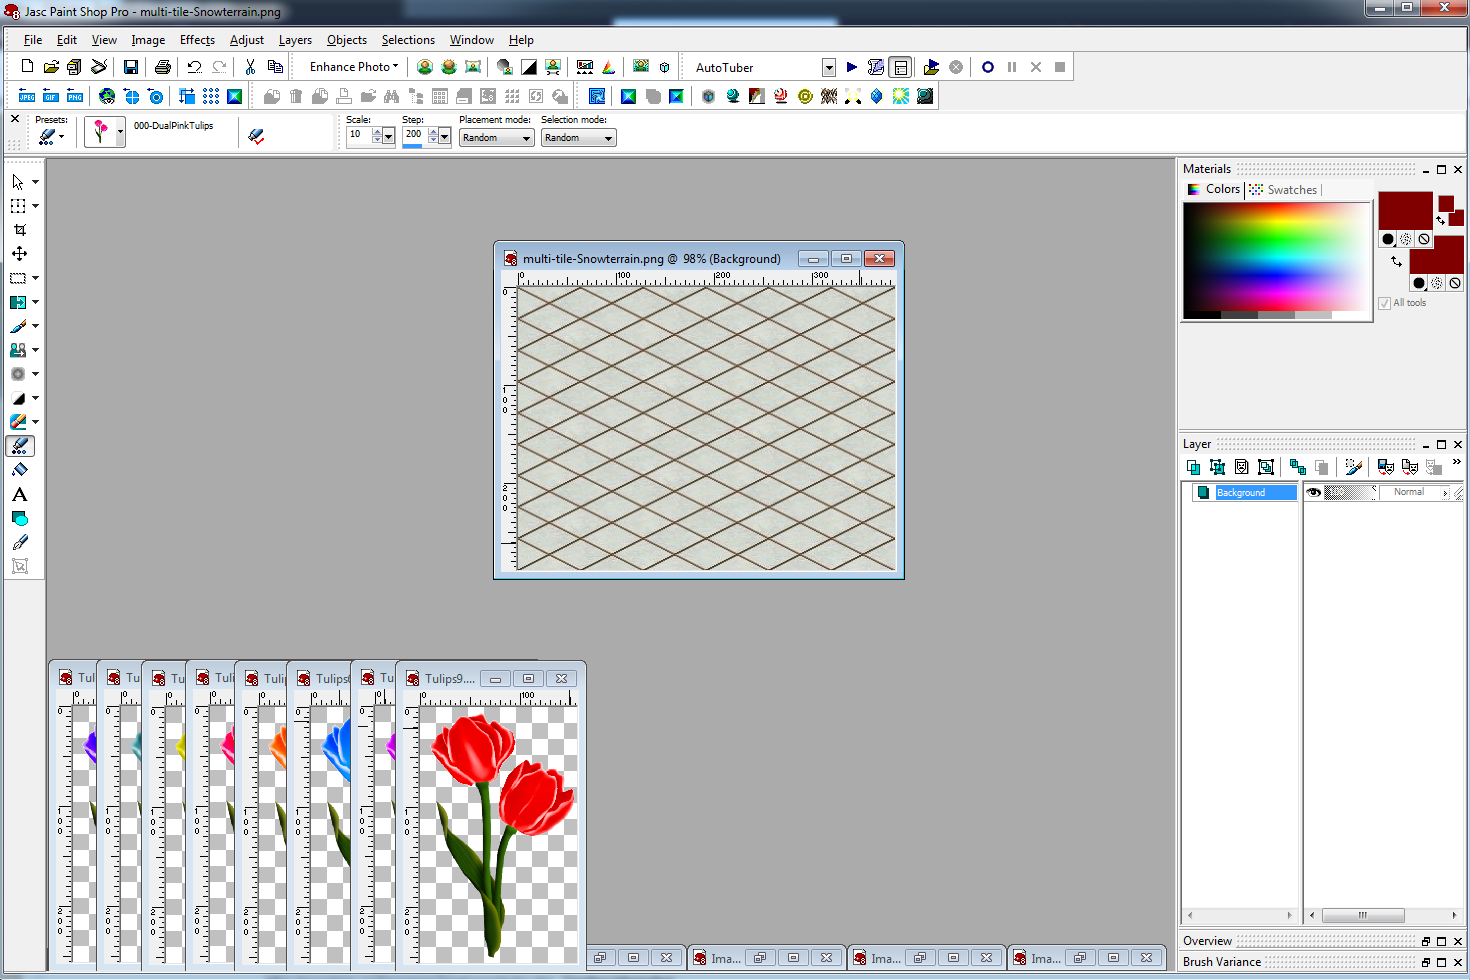
With the grid image cropped it's time to set up our scaled tulip image.
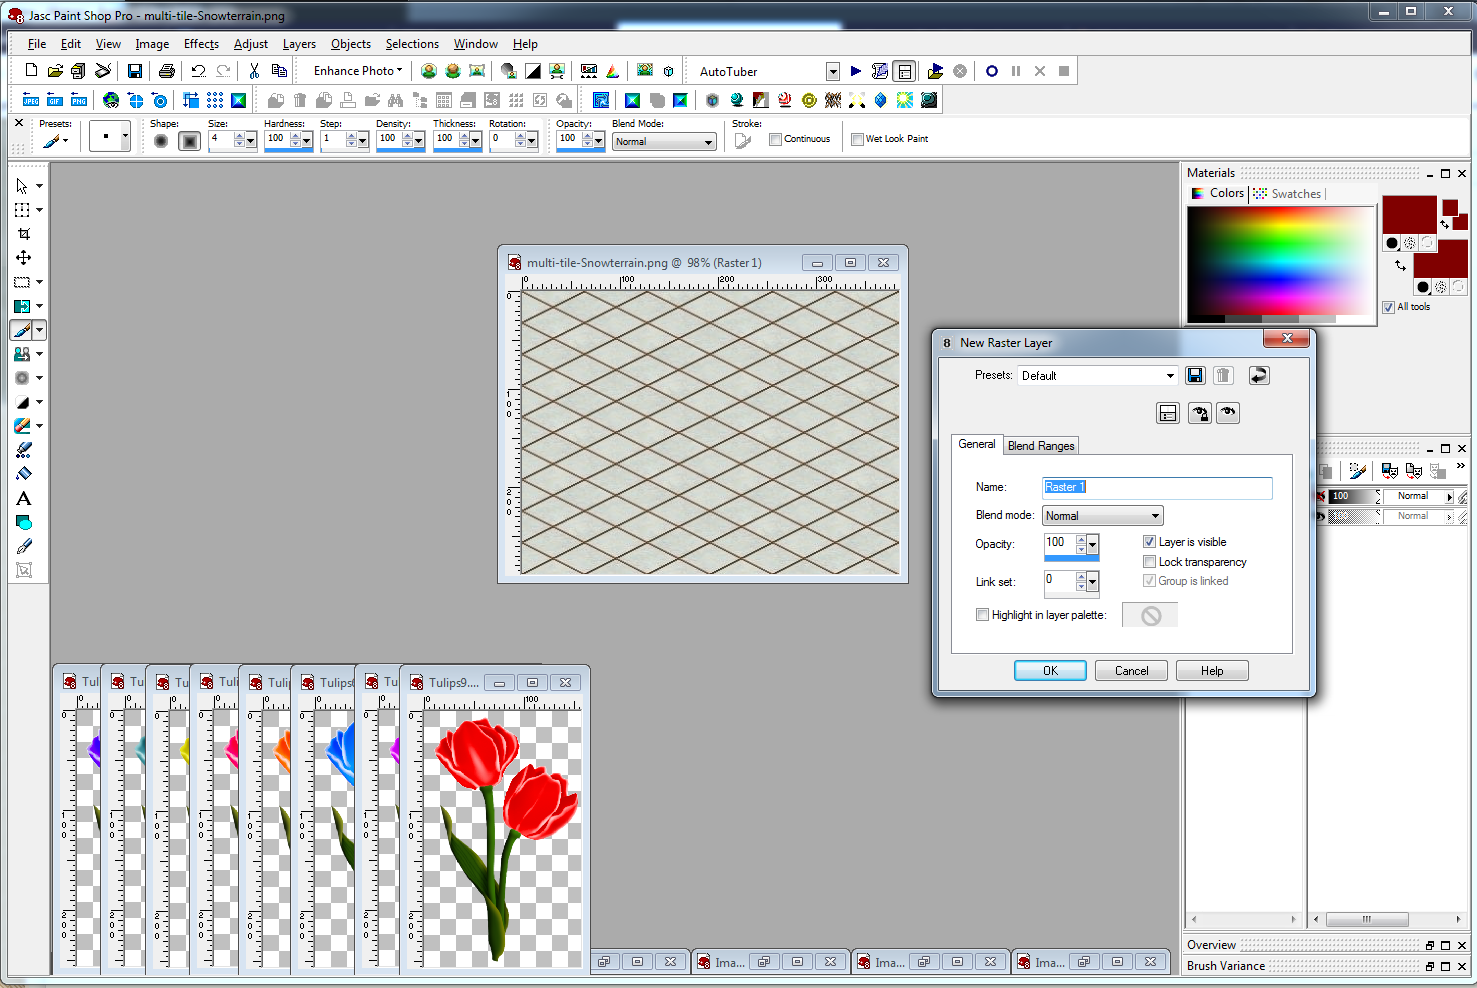
Add a new raster layer to the grid image
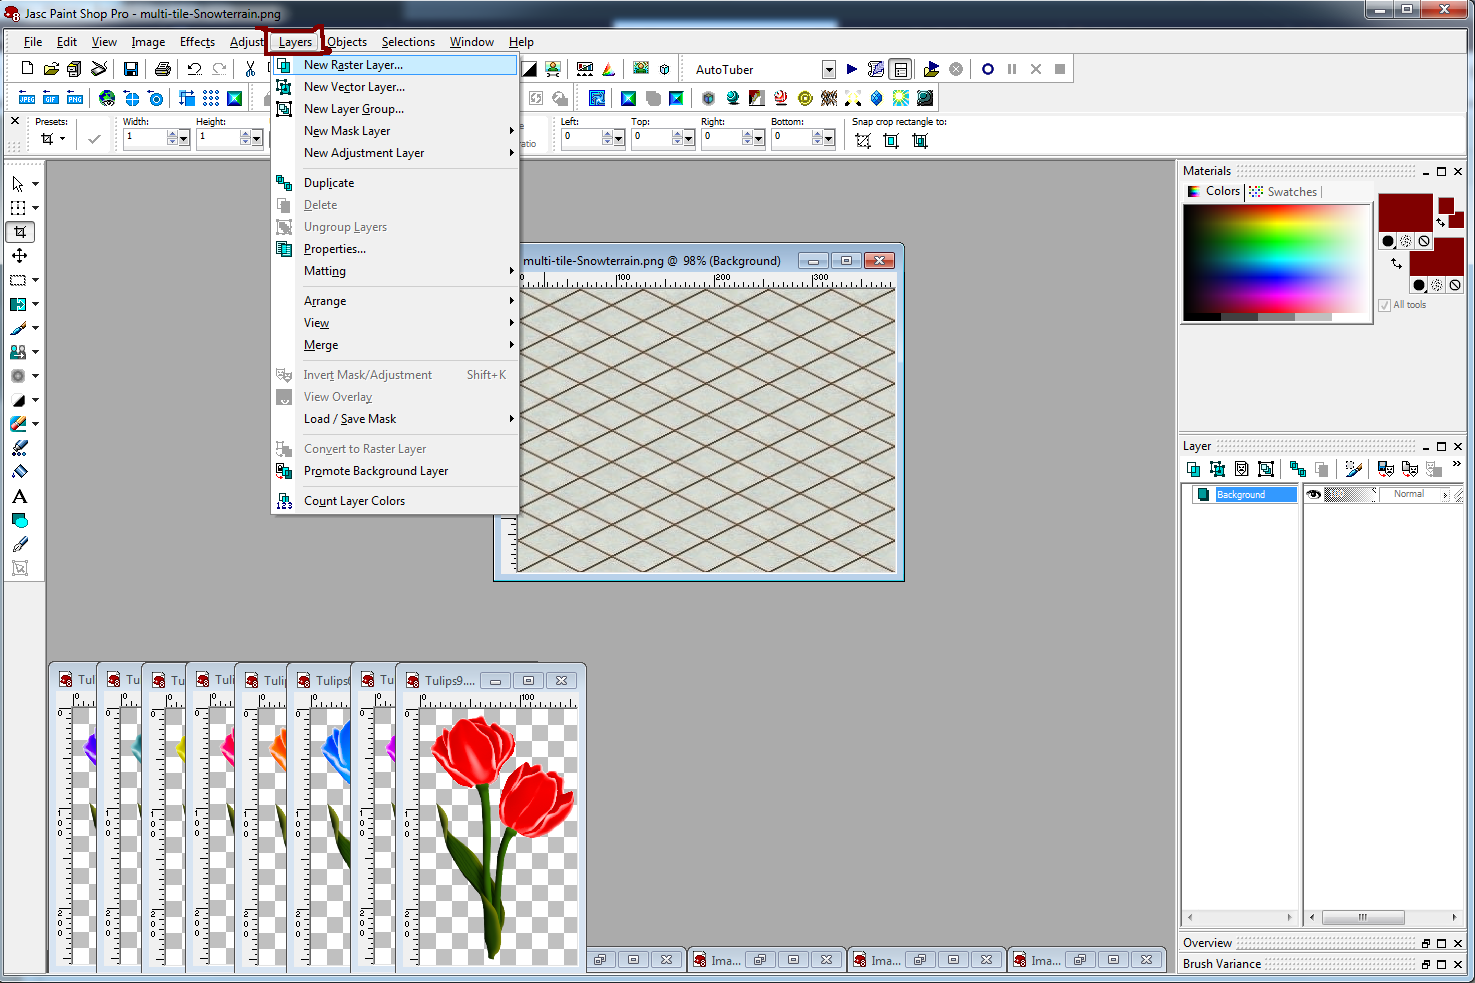
Your layer properties window will open. None of these settings need adjustment so just click ok to add your new layer.
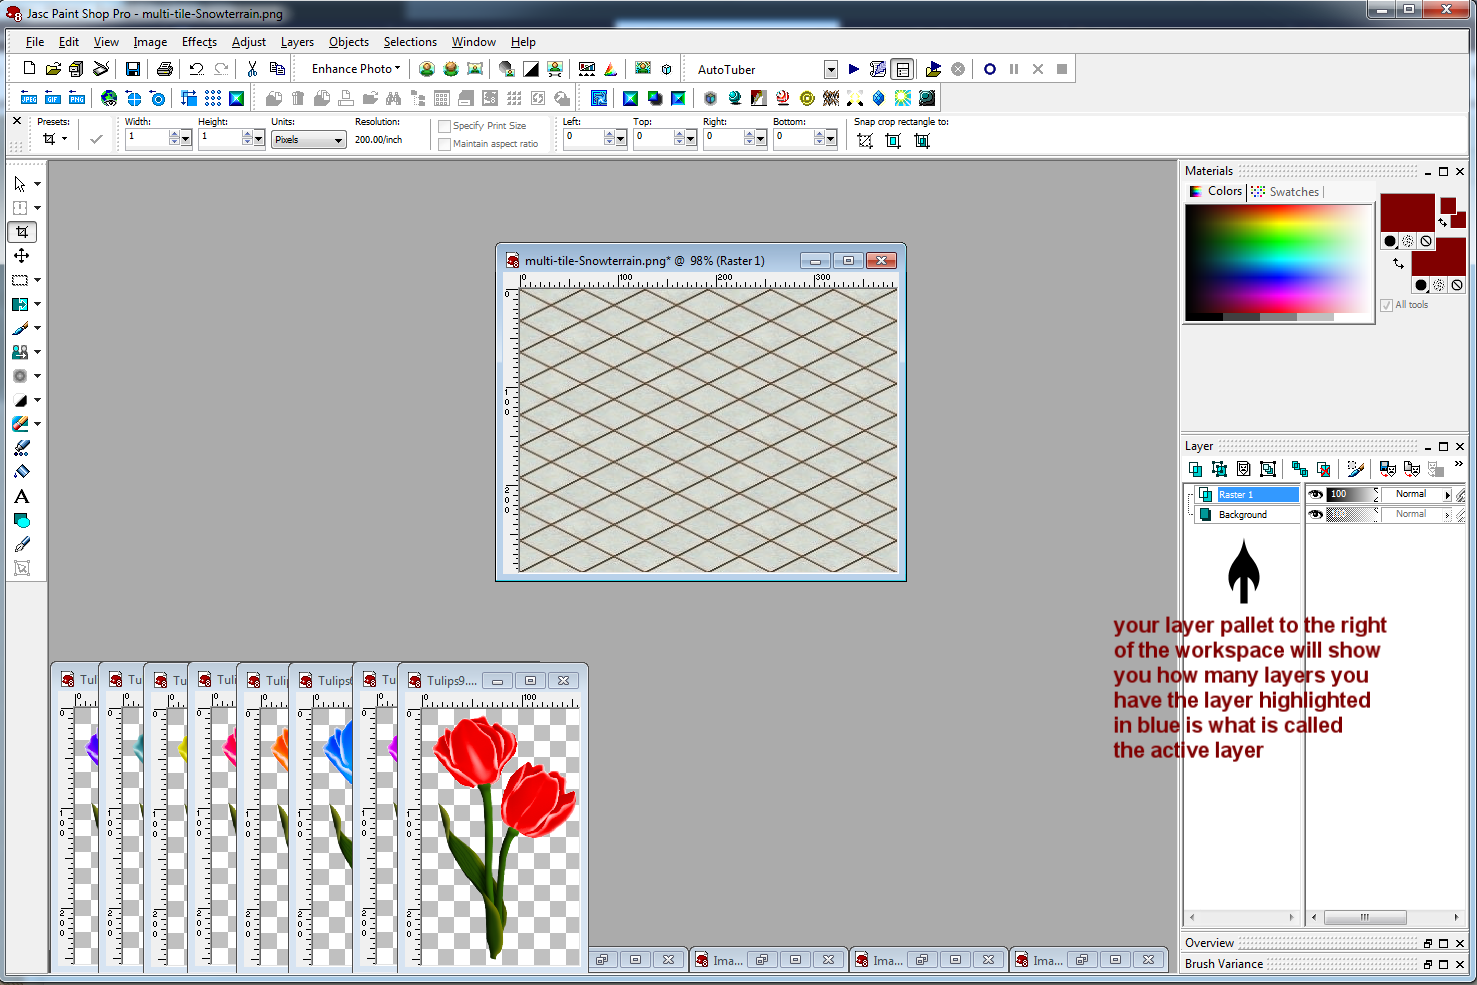
you'll notice in the layer pallet to the right we now have 2 layers for our image the active or working layer is highlighted in blue.
With our active layer selected in the layer pallet to the right it's now time to paint our picture tube image onto the layer so select the picture tube tool from the left menu. Because we went through the selection and scaling of our tube earlier it is all set to use to paint with so add just one instance of the tulip to your new layer. Just click anywhere in the grid to apply the tube to the layer if your flower is not sitting like mine it won't matter becuase we will be removing the grid layer with some more editing needed later.
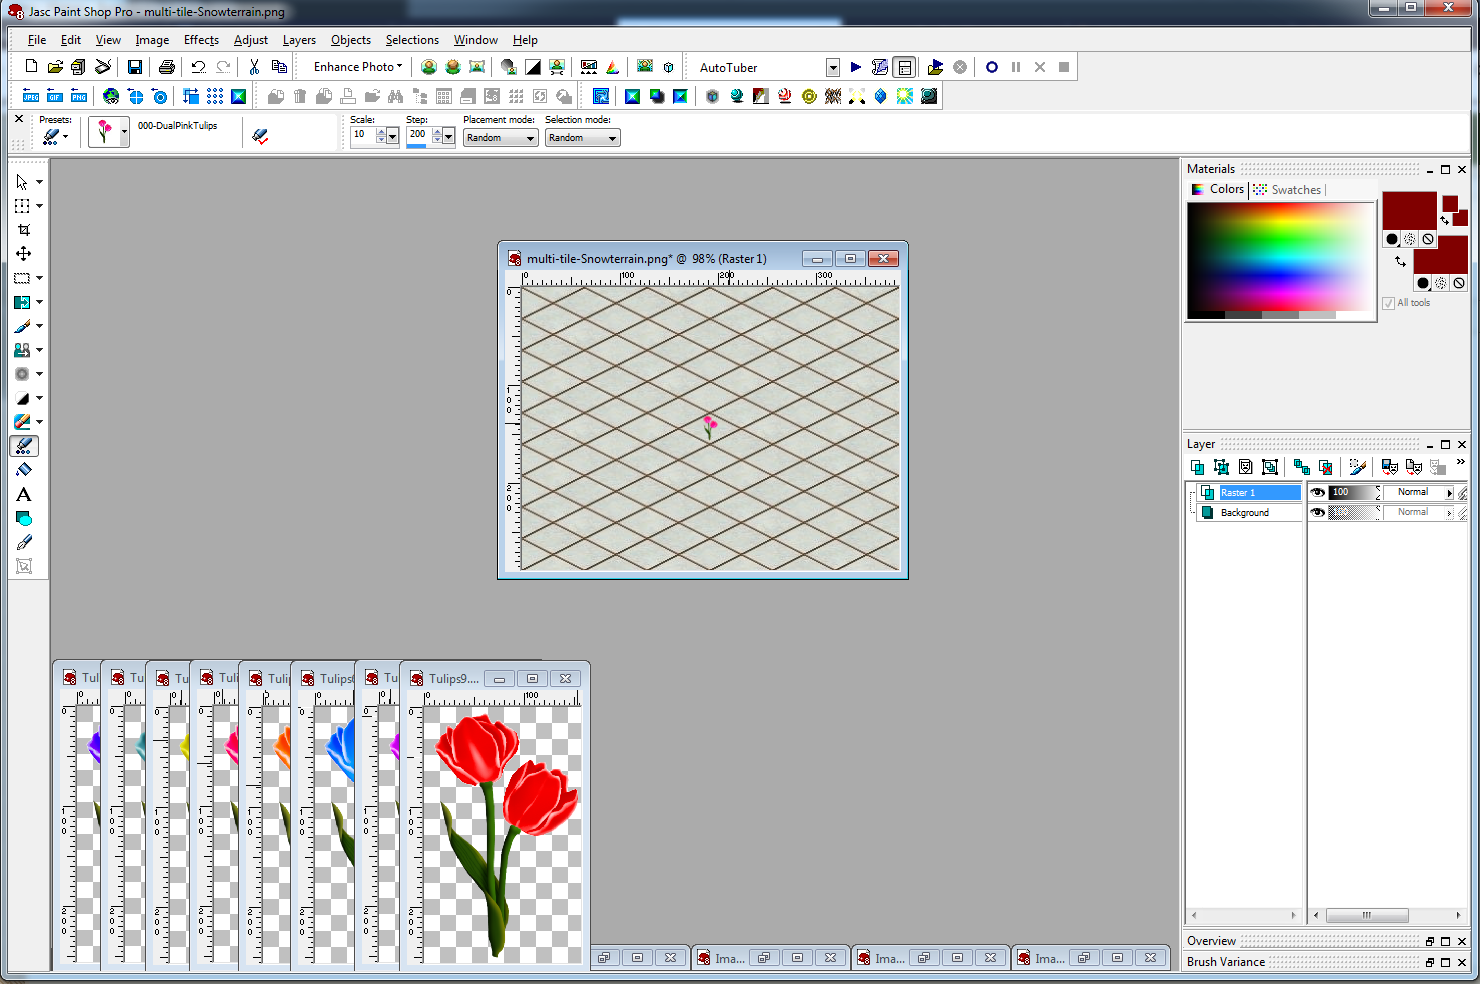
as you can see with the tulip now layered on the grid you get a better view of the size. to size it any smaller would lose a lot of the detail in the image so we will just use this image for our Simple Flower file.
When we resized the original image and then converted it to a tube and scaled it down to the size we need it created what are called ghost pixels around our image. These ghost pixels may not be that noticeable in our view at the moment but if we just save out layer as a png file and put it in ape the ghost pixels will become a solid white color and take away from our pretty tulip image so before we move on to saving our image for ape we are going to either recolor those ghost pixels or delete them. For this I use a very tedious method because I am what is called a pixel junky. I edit at the pixel level so my images are as clean as possible for a good quality finished file. to do this we are going to make the grid layer invisable by turning it off in the layer pallet to the right.
look at the layer pallet and make sure the pallet is wide enough for you to see all the icons available. You should see an eyeball icon so on the background layer we click the eyeball icon to turn off the visibility of that layer.
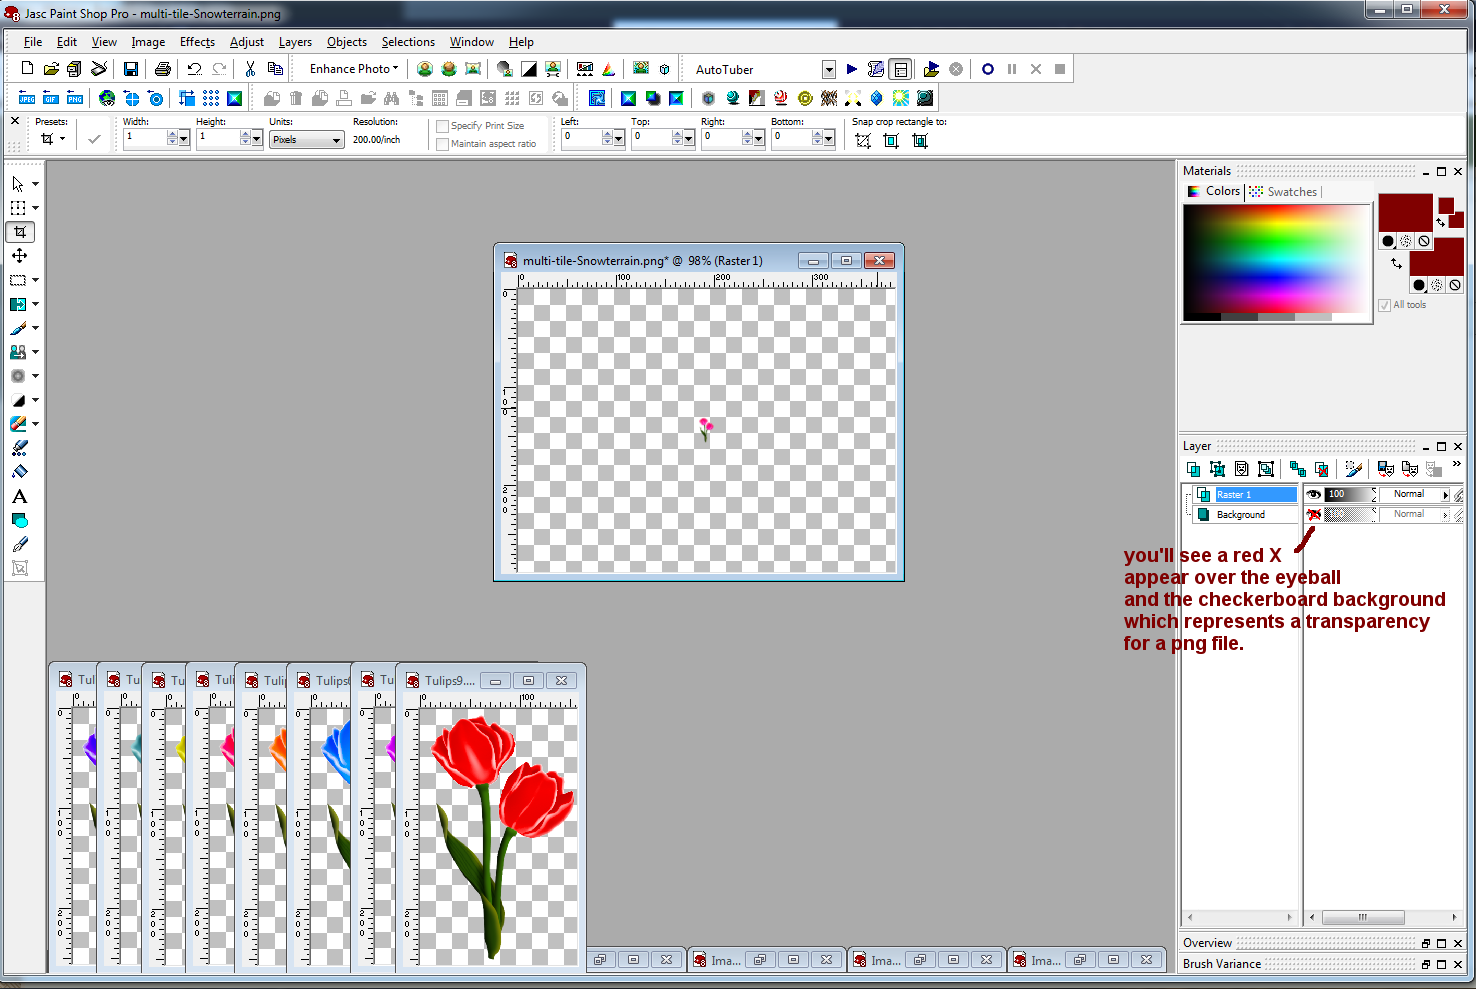
to make the grid visible again just click the eyeball again to turn on layer visibility. For now we are going to leave it off and we are going to see if there are any ghost pixels that need adjustment. To do this we are going to zoom in on our image.
Go to the top menu bar and click View/ zoom in by 5. do this twice
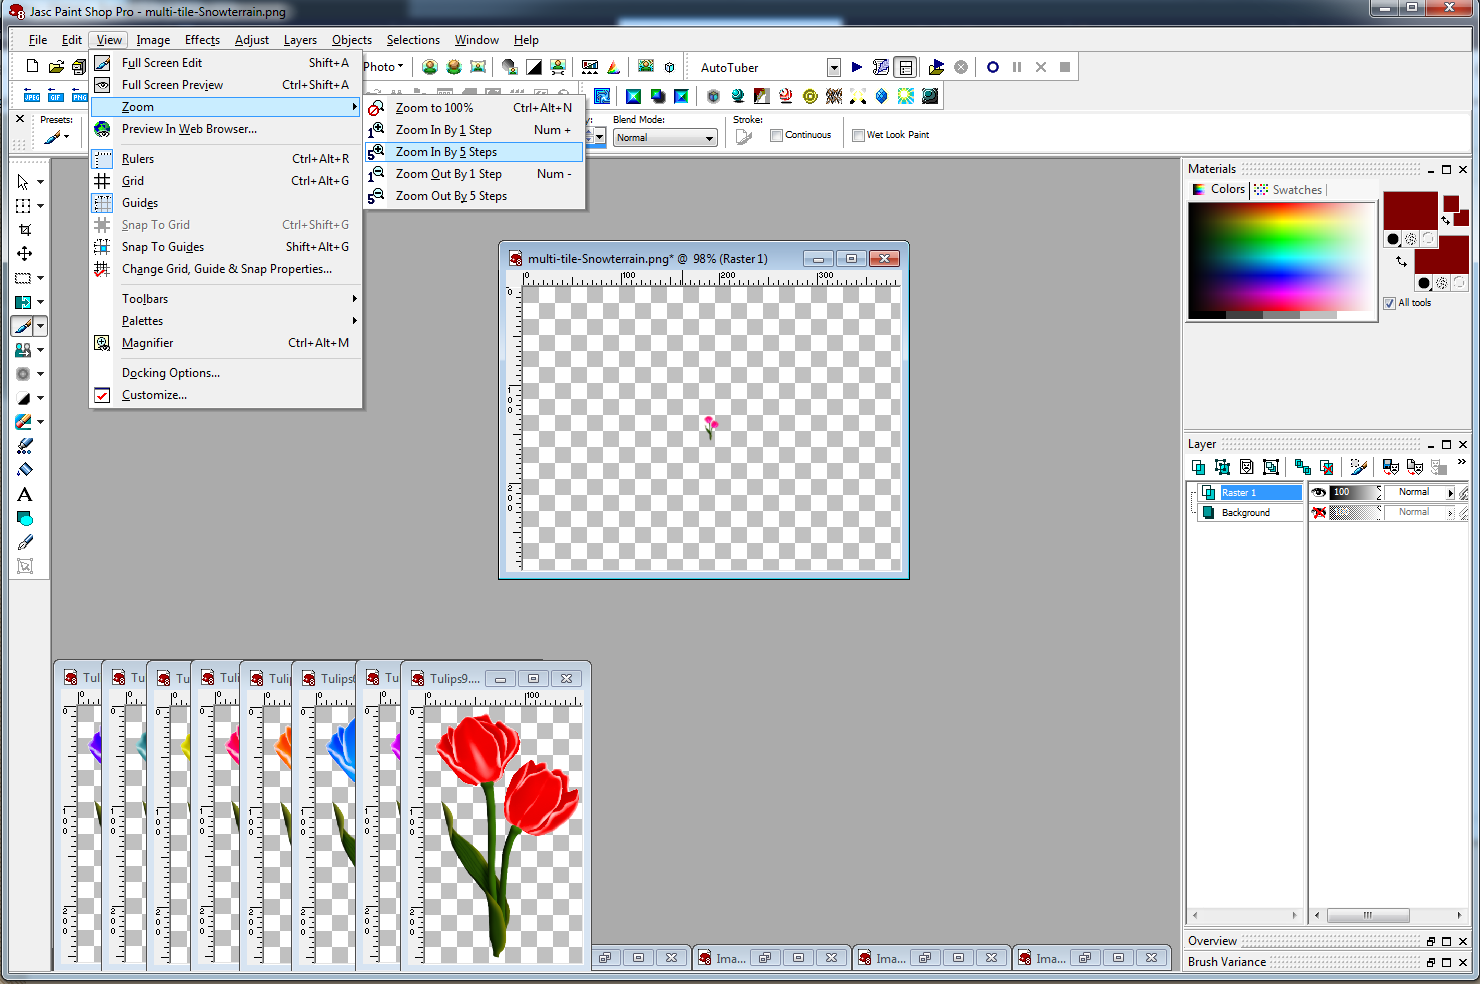
After doing it twice we can see there are a few ghost pixels we need to either edit with the clone tool or delete so we have a good clean image for APE.